Visual Studio Code
The JRebel plugin for Visual Studio Code (VS Code) can be installed using a VSIX file. The installation includes the JRebel agent that automatically generates the JRebel configuration. It enables JRebel for applications and servers with a single click and improves the debugging support in the IDE.
Installation
Installing the plugin from the VSIX file
The JRebel plugin is bundled with the VSIX file and automatically installs the plugin for VS Code.
To install the plugin from a VSIX file:
Install the VSIX file from the Extensions: Install from VSIX… command in the Command Palette… or the Extensions sidebar, from the Views and More Actions… menu, select Install from VSIX…. A file explorer window opens.
Navigate to the downloaded VSIX file for the JRebel plugin and click Install.
Restart the IDE if prompted to complete the plugin installation.
To verify the successful installation of a plugin, in the sidebar, click the JRebel icon
 . The JRebel plugin pane opens.
Activation
Following the installation, you do not have a license yet. Once your IDE restarts, the JRebel plugin notifies you about JRebel Activation. On the sidebar, select the JRebel icon and navigate to User Settings > Dashboard and then click Add License.
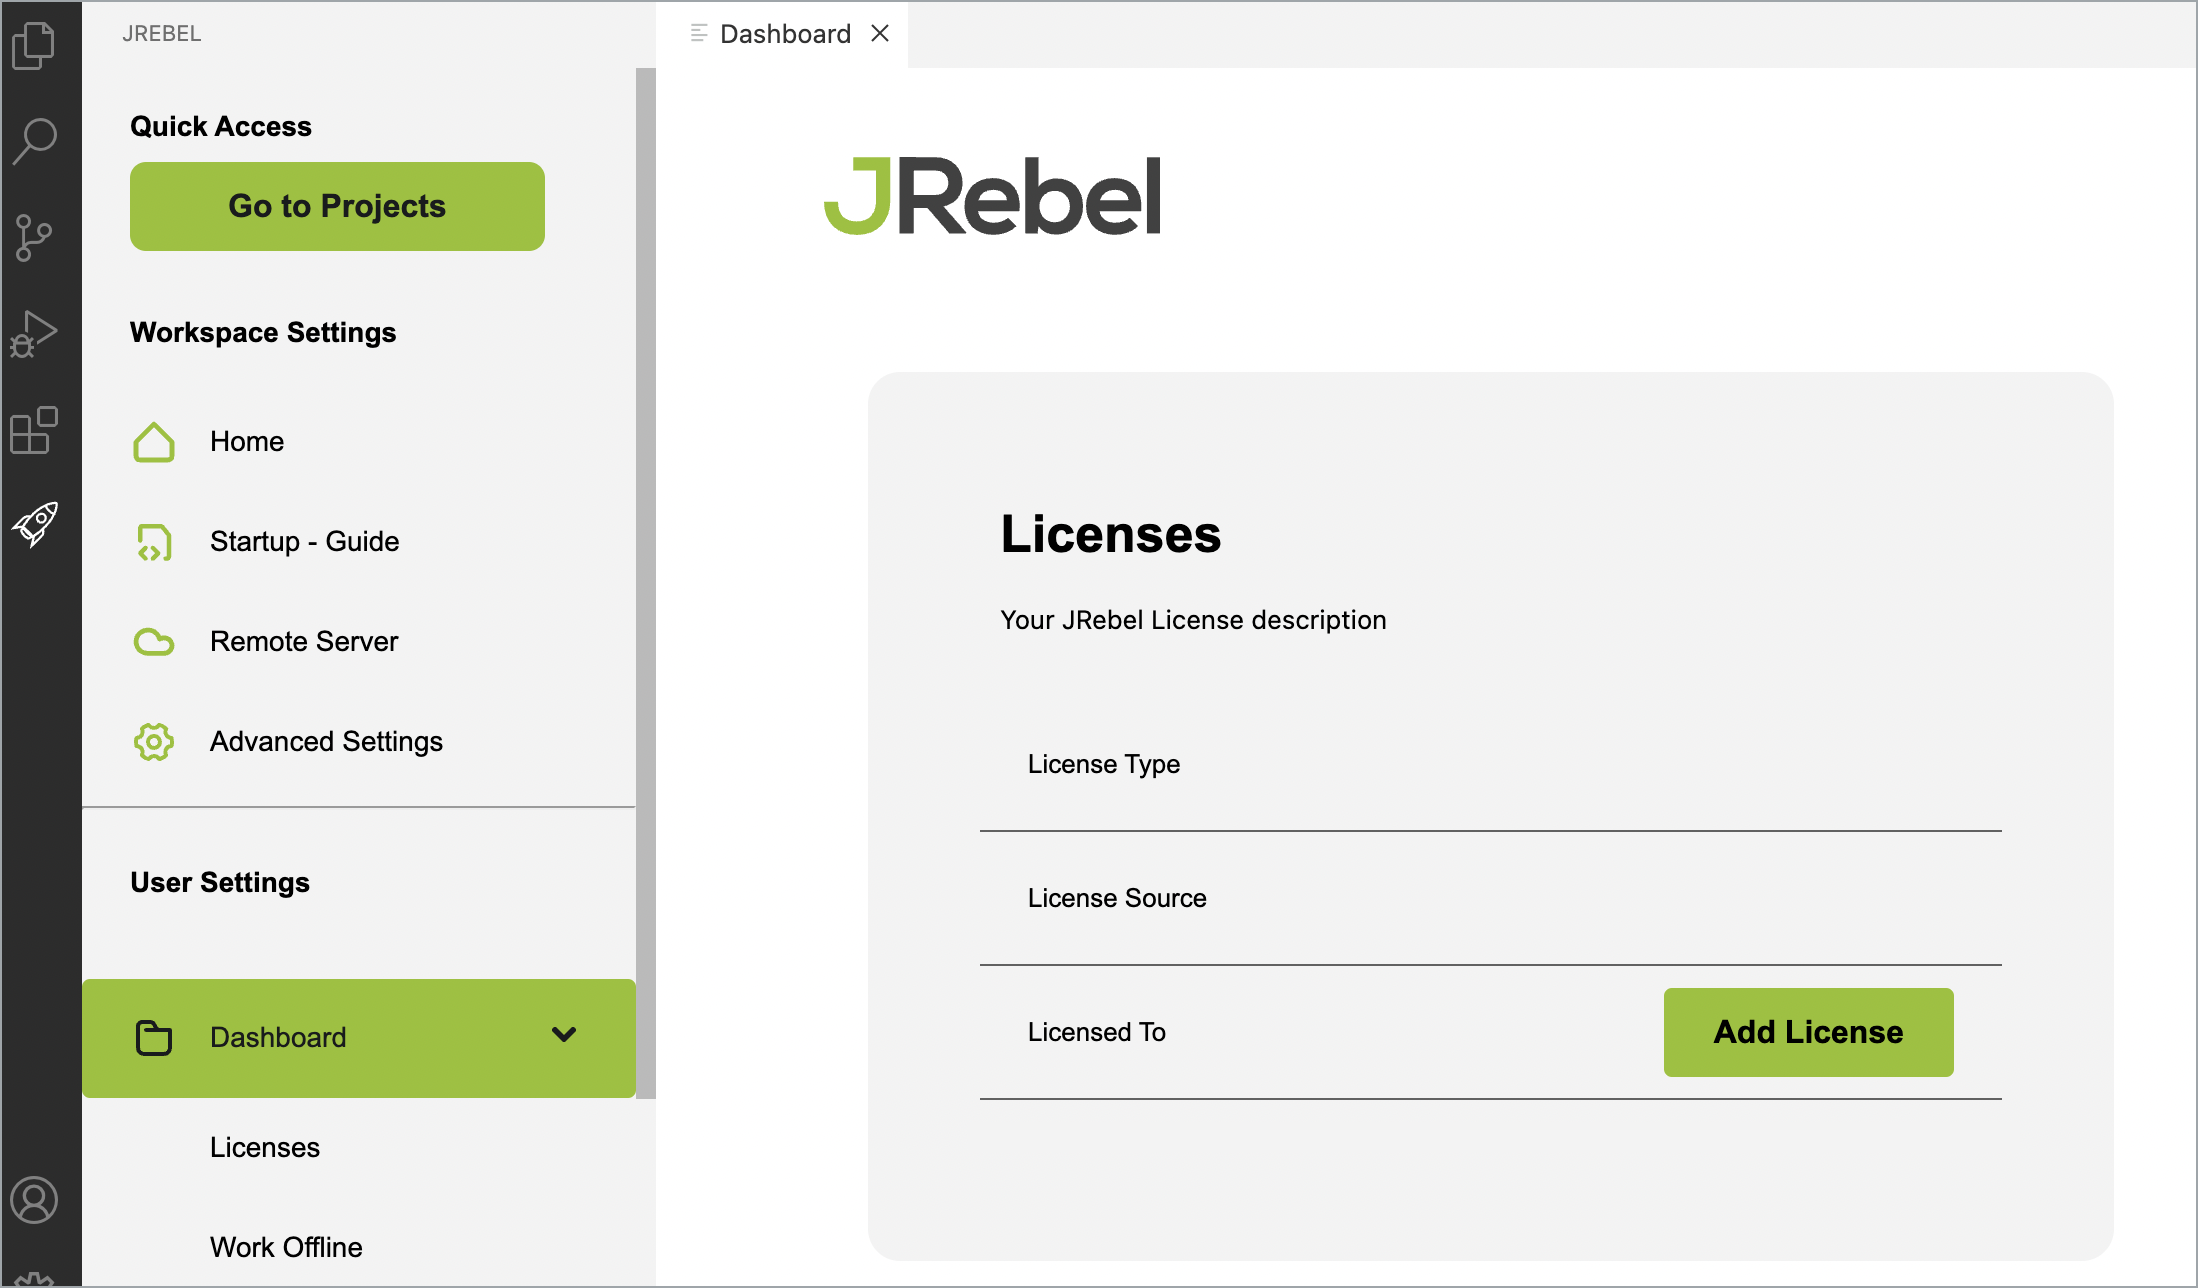
The Activate JRebel window opens. The JRebel Activation window contains two tabs: Commerical License and Individual Trial.
Commercial License
Open this tab if you already have a JRebel license. You can select one of three activation options:
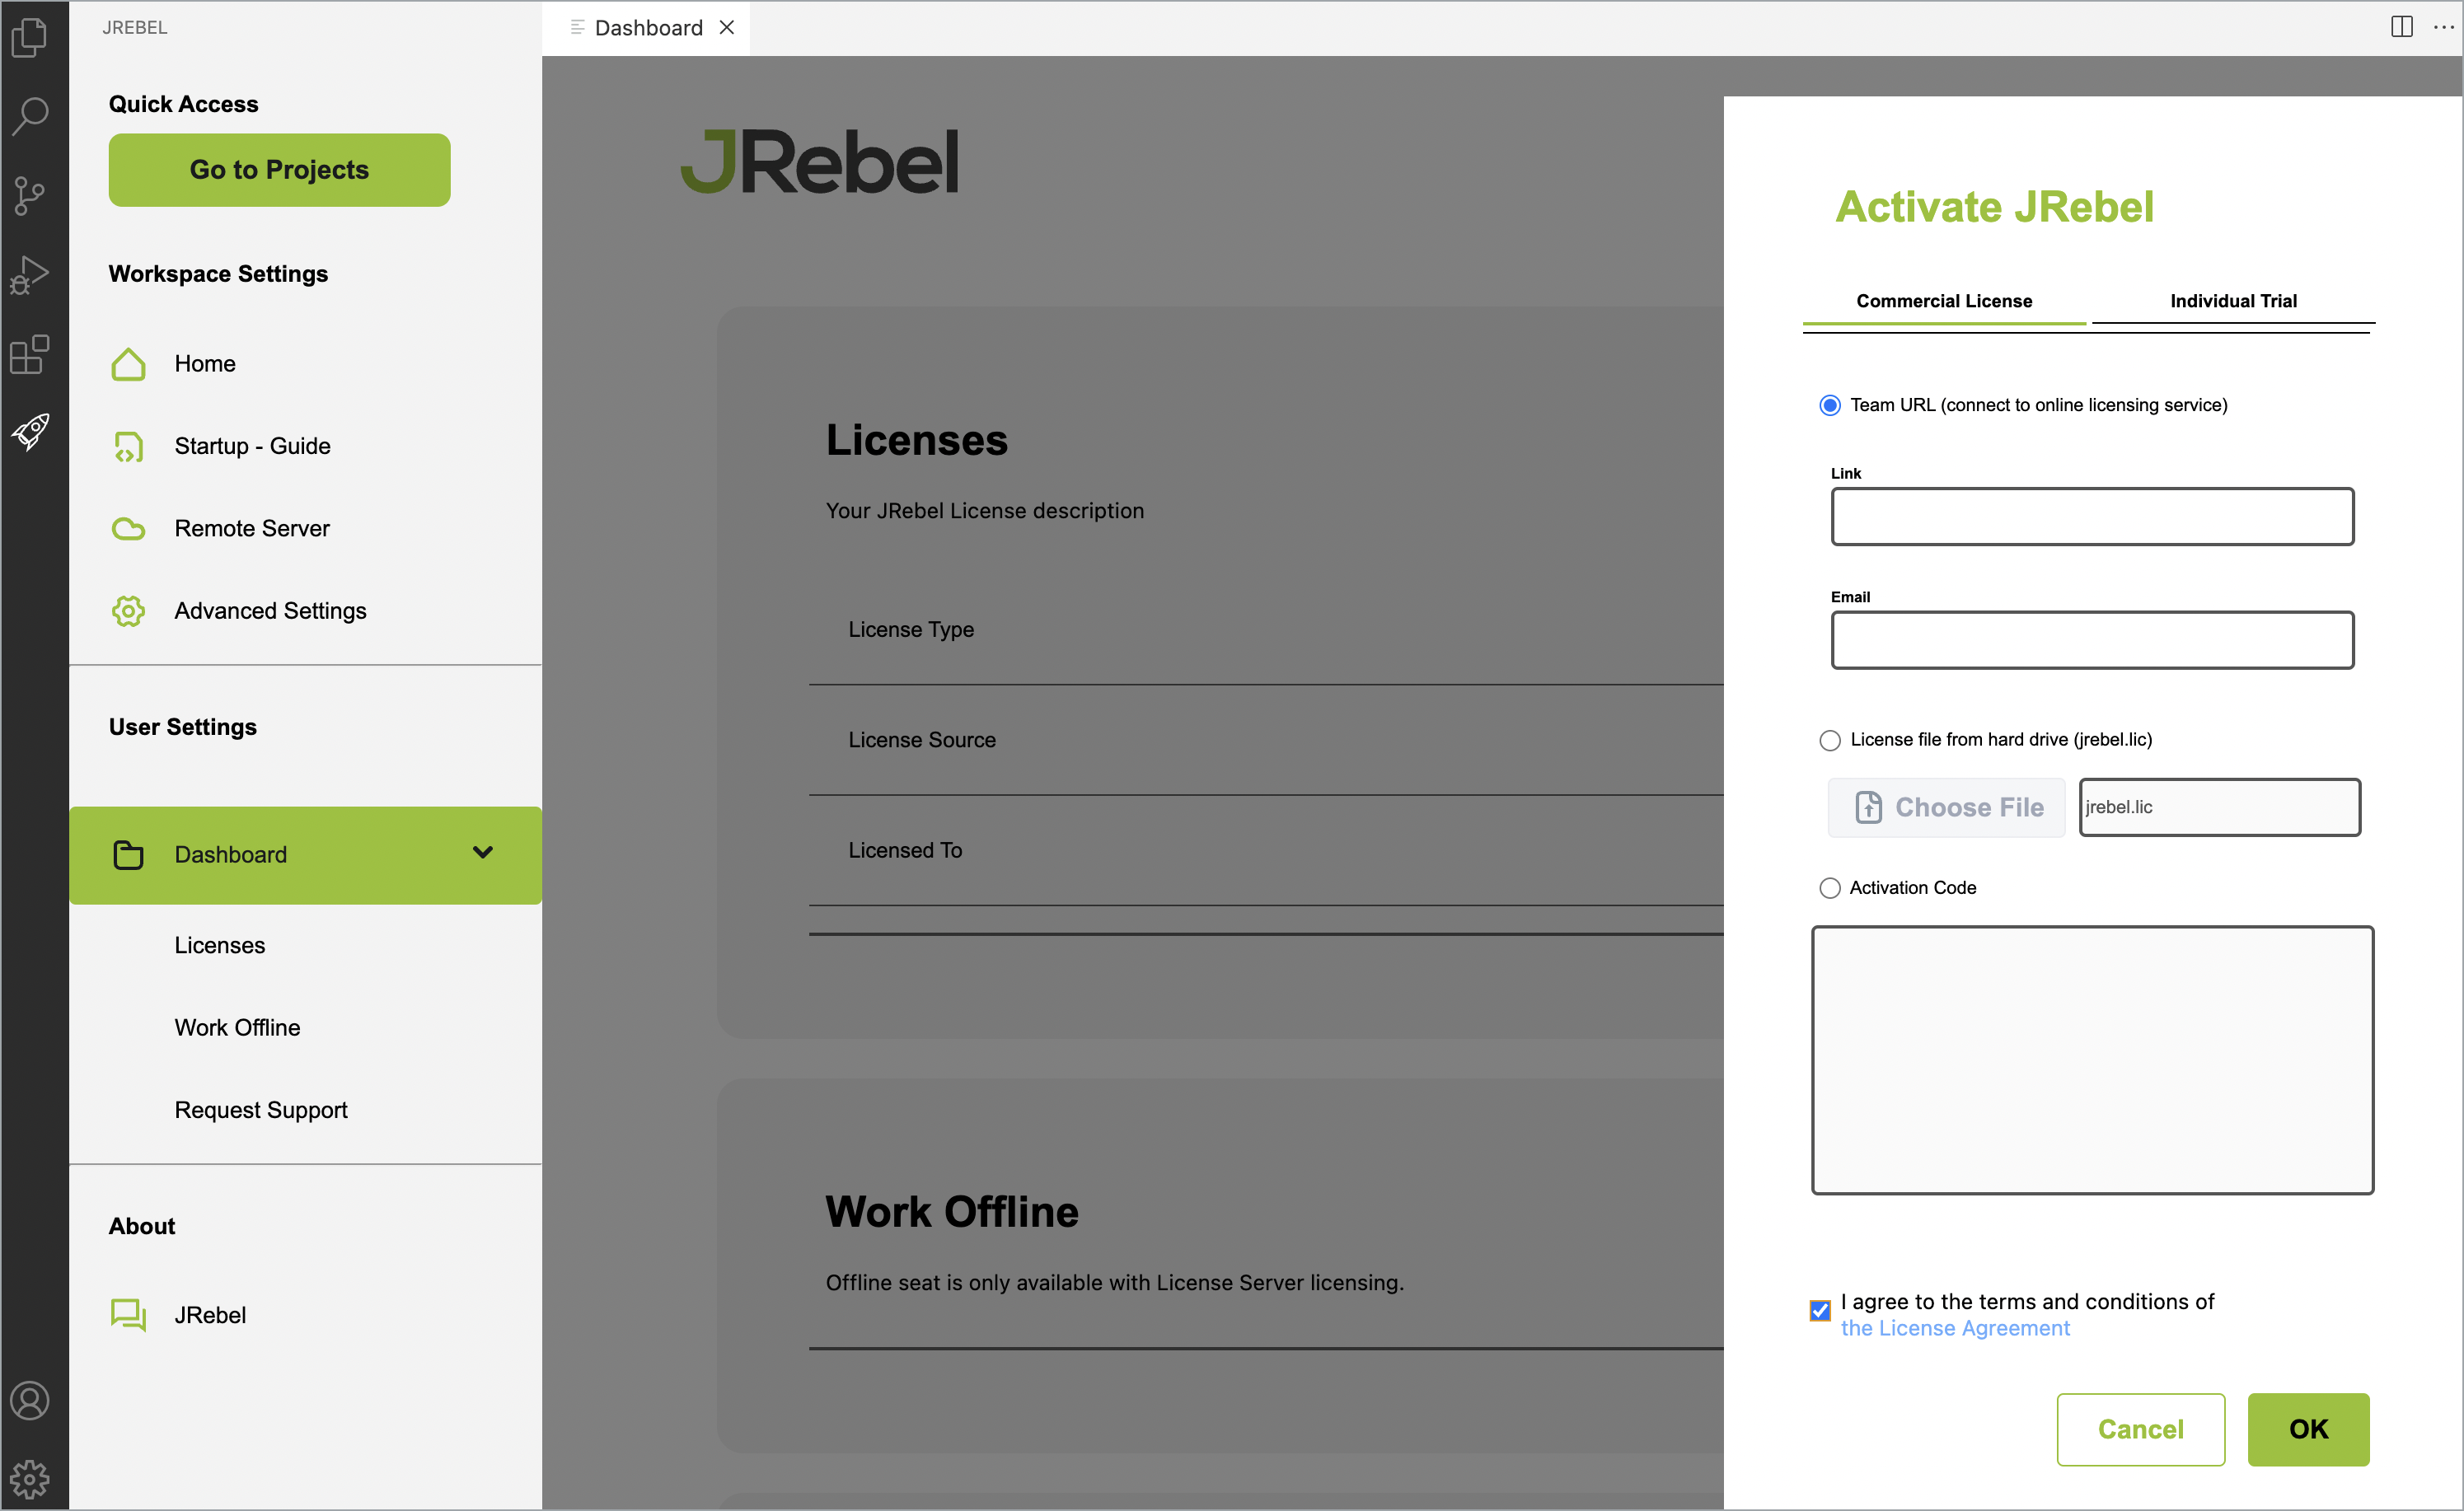
Team URL (connect to online licensing service) – Select this option if your network administrator provides you with a Team URL. The Team URL is a unique URL consisting of the License Server address and a unique key. Specify the Team URL link in the first field and enter your email address into the second field. Click OK to activate JRebel.
License file from the hard drive (jrebel.lic) – Select this option if you bought a license. We will email you a
jrebel.liclicense file. Click Choose File and locate thejrebel.licfile on the hard drive and then click OK to activate JRebel using the license file.Activation code – Select this option and enter the trial activation code in the text field. Click OK to activate using the activation code.
Click to select the checkbox I agree to the terms and conditions of the License Agreement to have a fully functional JRebel.
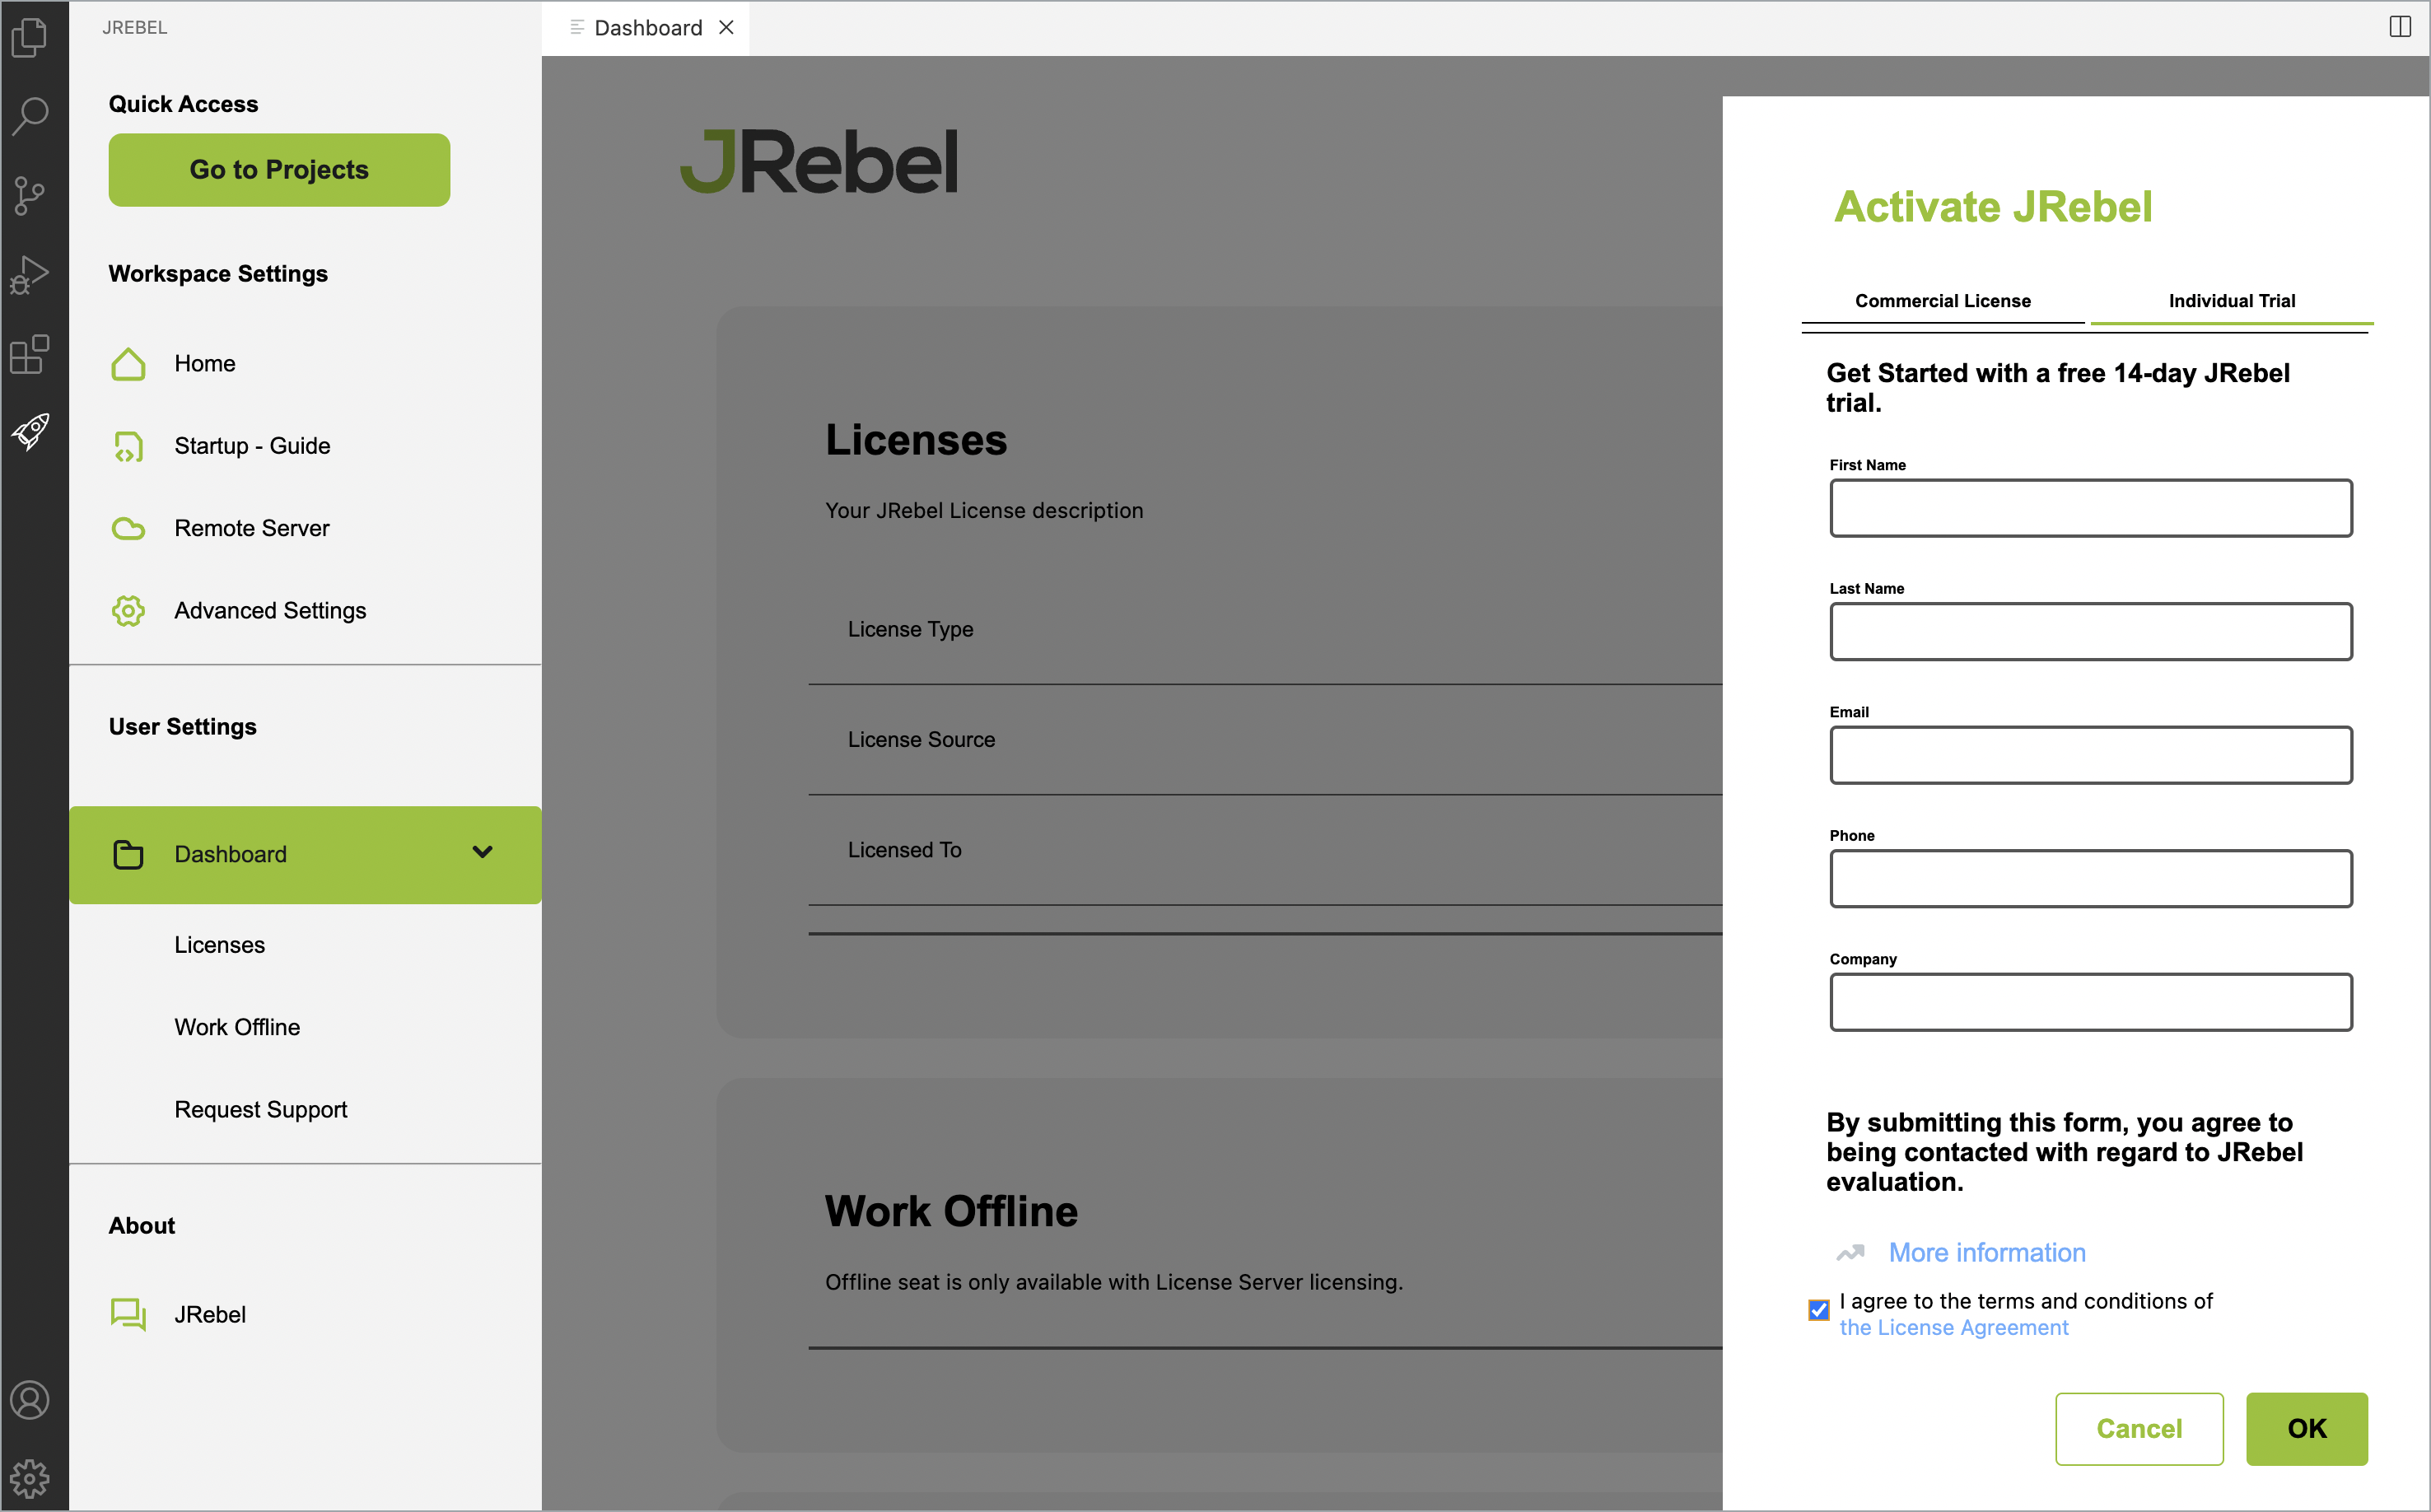
Individual Trial
To start with a free 14-day JRebel trial, enter your First Name, Last Name, Email, Phone, and Company information in the appropriate field. Click to select the checkbox I agree to the terms and conditions of the License Agreement and then click OK.
Project configuration
JRebel requires just one configuration file rebel.xml, which is generated automatically and used to map the running application to the workspace. To open JRebel, navigate to View > Open View… > JRebel or the View: Show JRebel command in the Command Palette.
Note
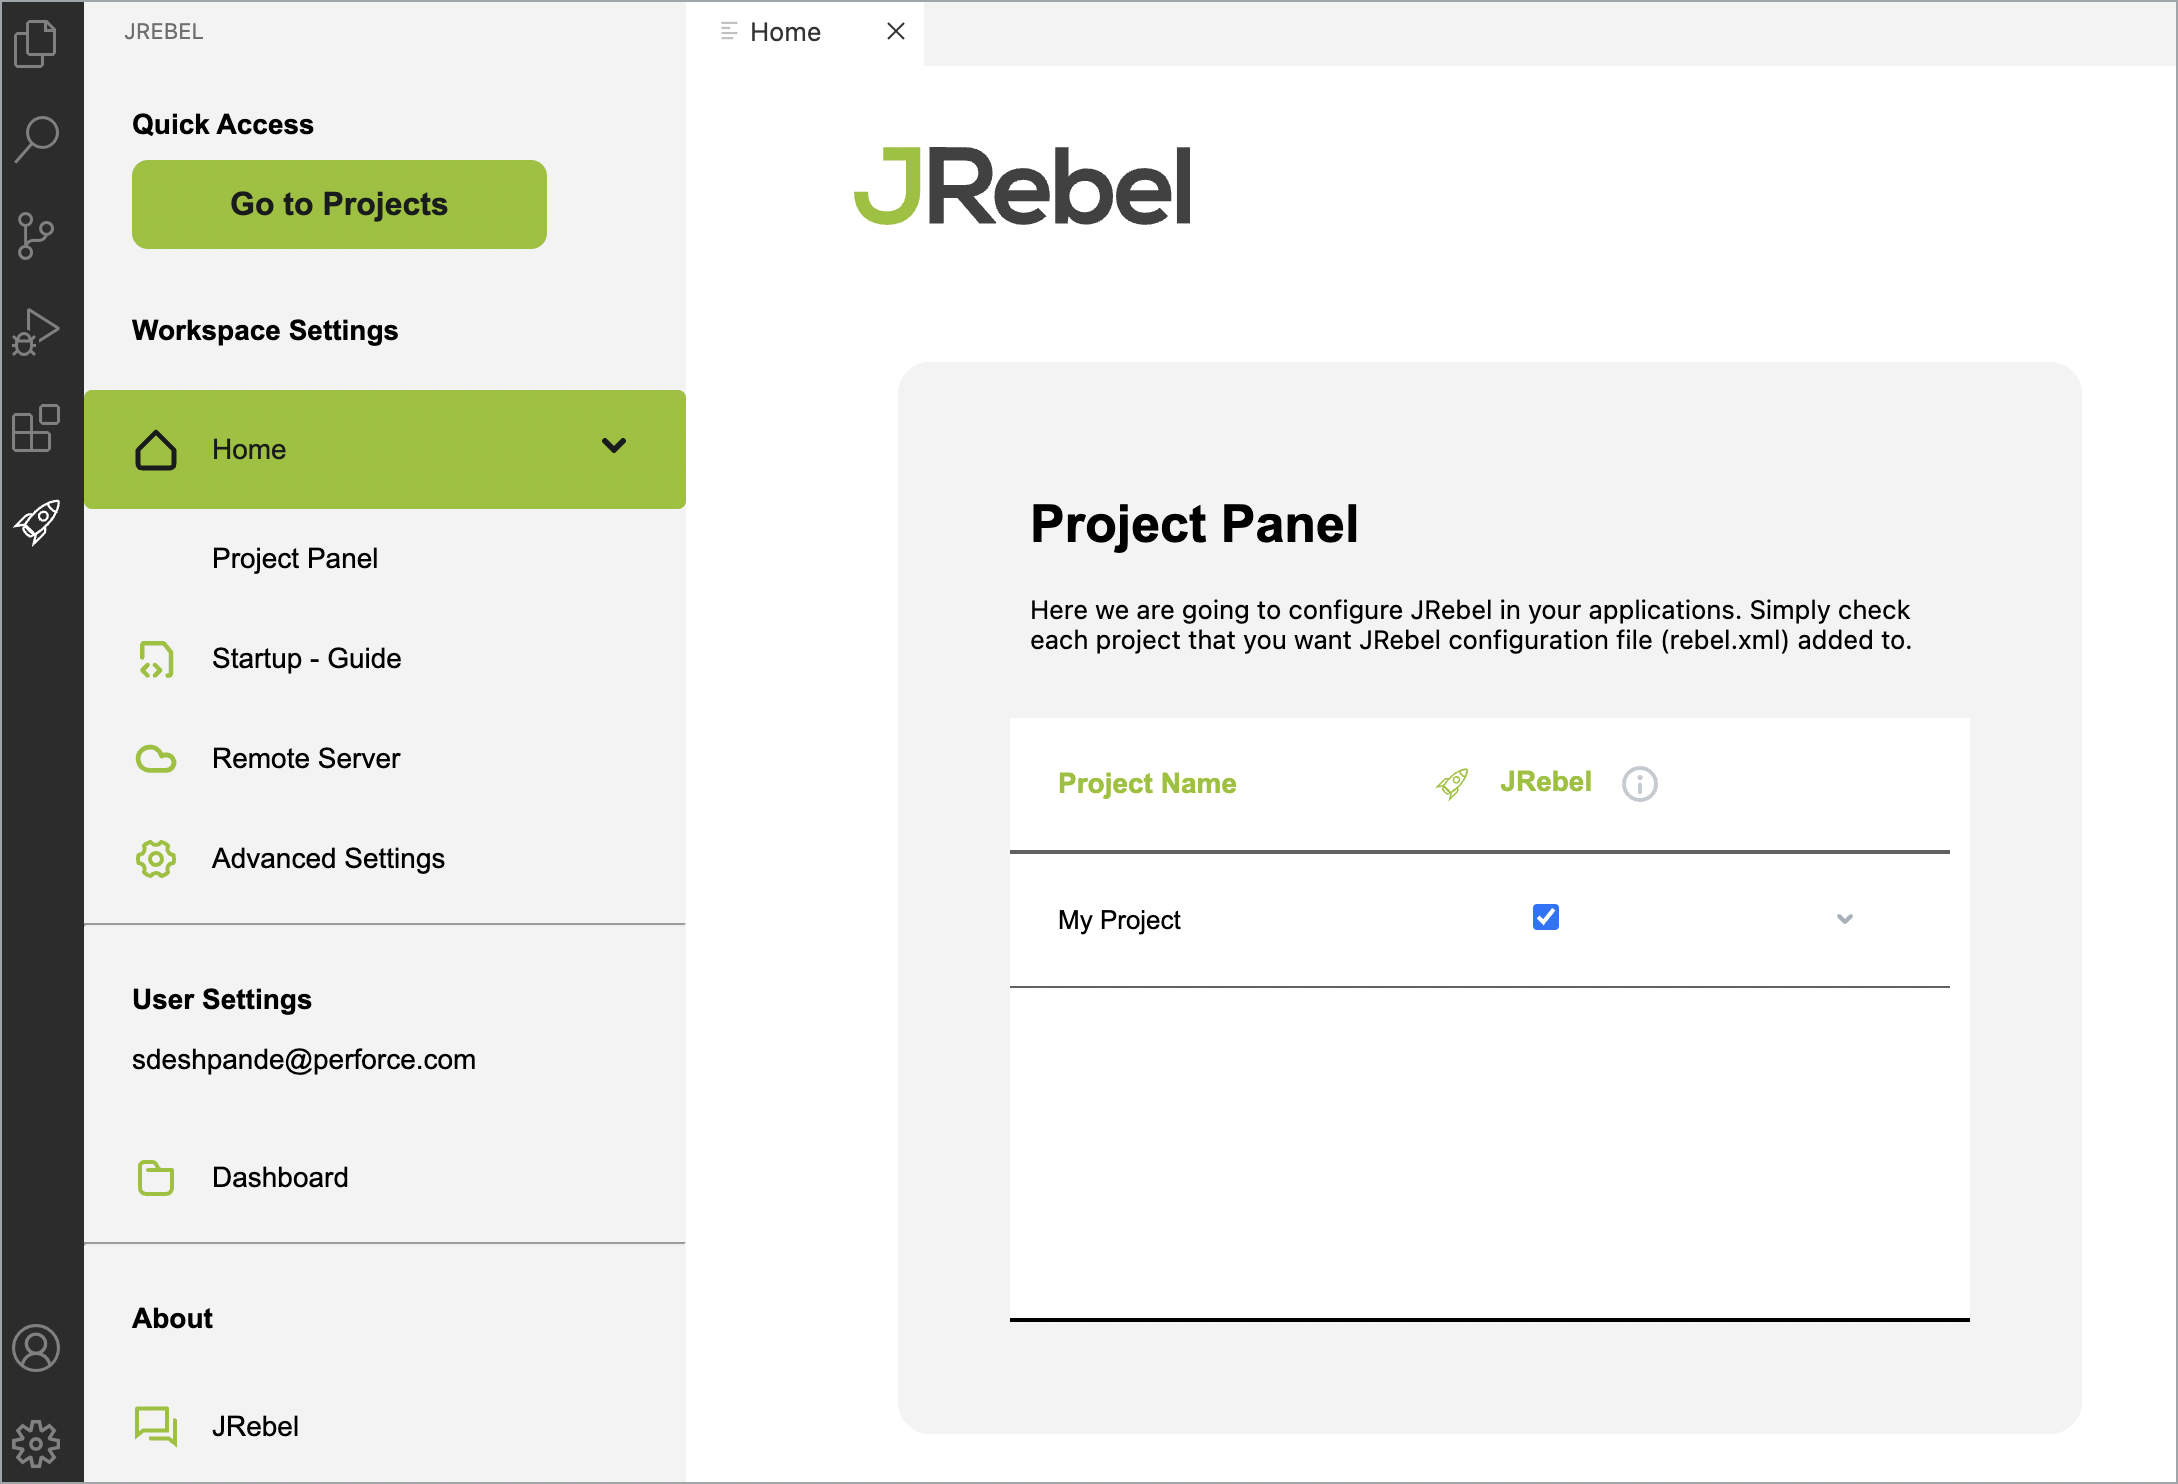
Installing the JRebel extension for VS Code does not enable JRebel for projects automatically. To enable JRebel for a project, navigate to JRebel
> Workspace Settings > Home > Project Panel or JRebel > Quick Access > Go to Projects and click to select the checkbox for a project to automatically generate the rebel.xmlfile that resides under the source tree of a project.A dedicated configuration file is generated for every module in the project. Once you have generated
rebel.xml, you need to redeploy your application to the server for the configuration to take effect. To make modifications to the configuration file, see the Reference for rebel.xml file format.
Using relative paths in rebel.xml
Refer General IDE configuration for instructions to commit rebel.xml and share the configuration with the whole team.
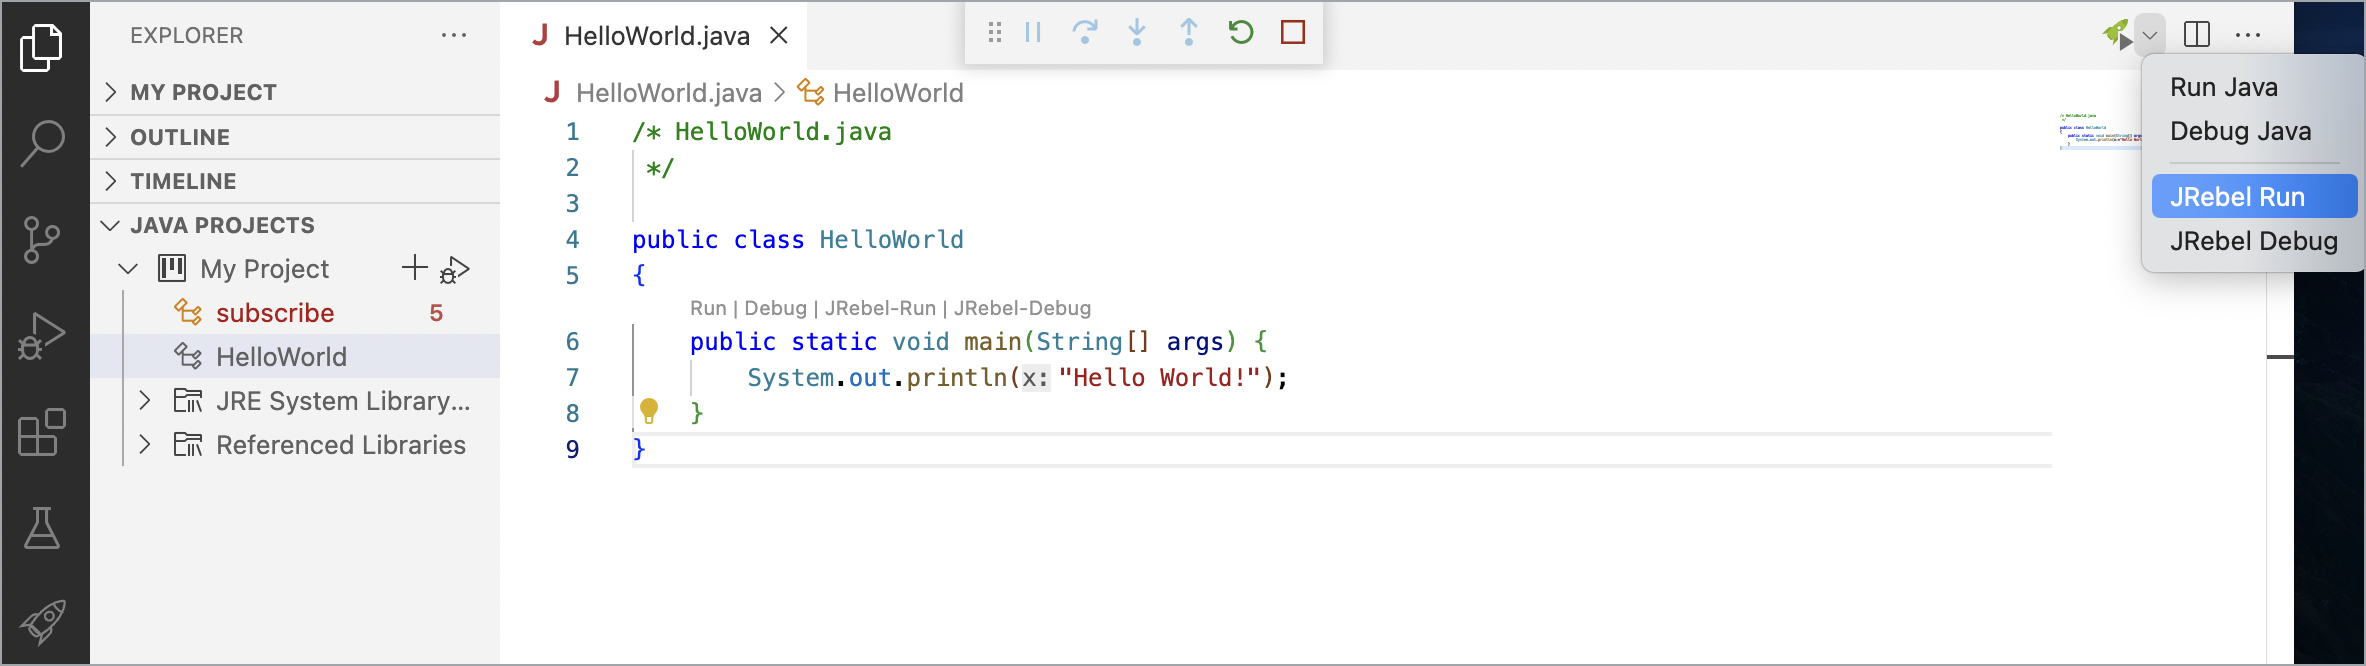
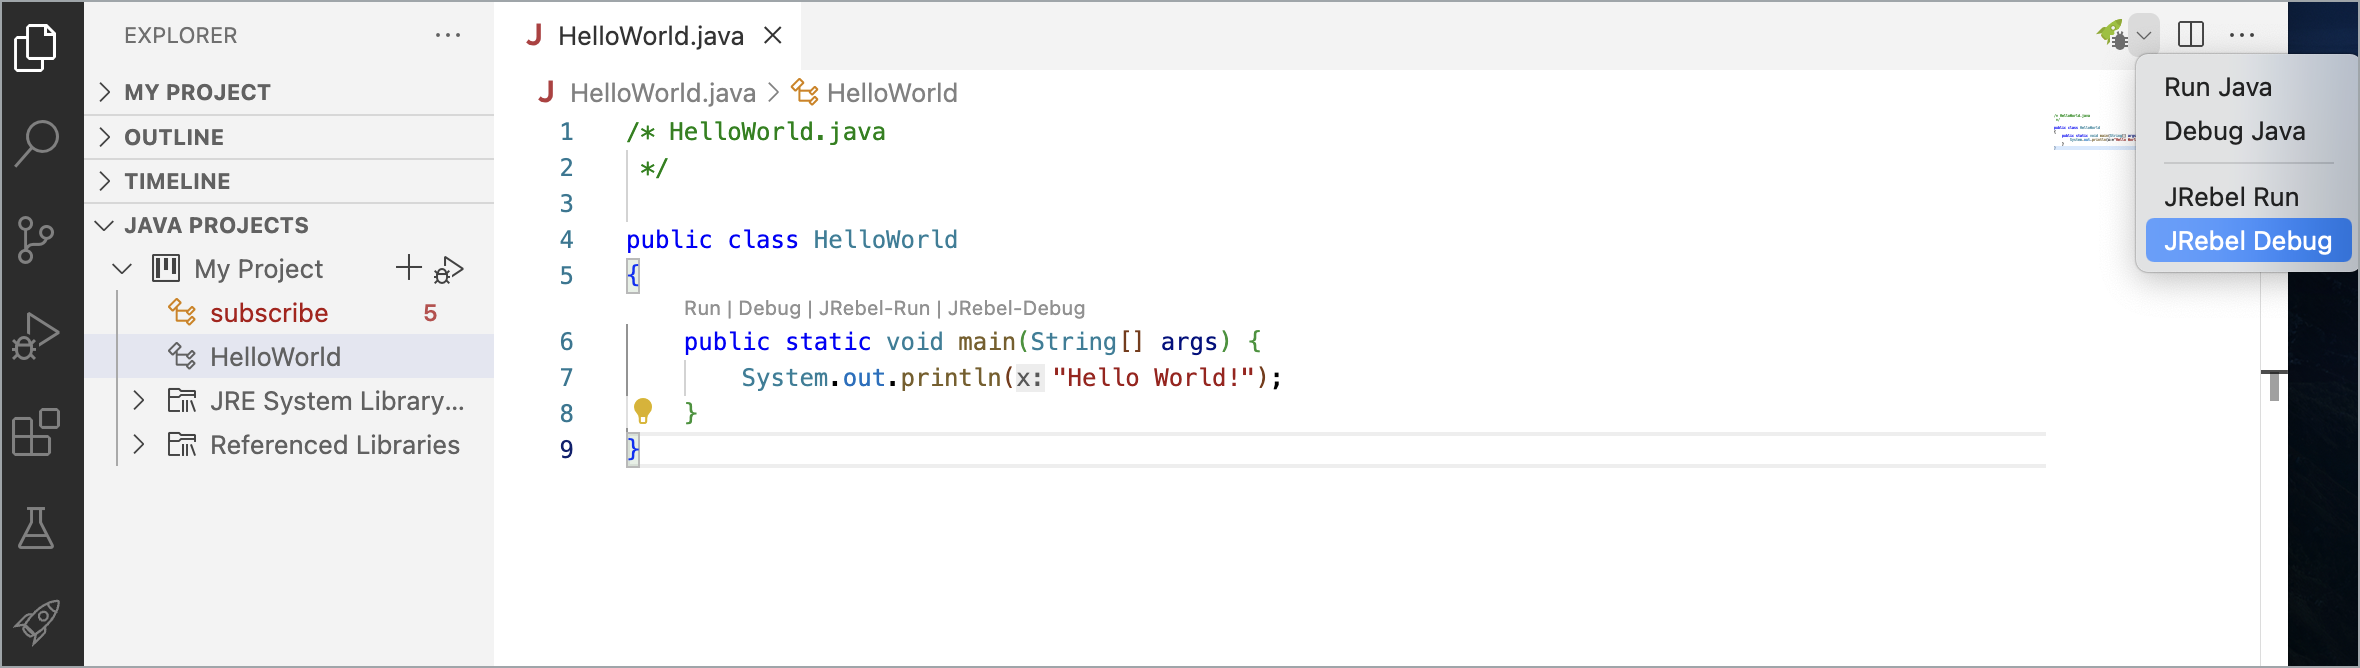
Server startup
The JRebel plugin for VS Code includes the dedicated launch buttons JRebel Run and JRebel Debug. JRebel Run launches the application with JRebel, and JRebel Debug launches the application with JRebel in debug mode. Launching the process using JRebel Run or JRebel Debug, the JRebel plugin automatically adds the appropriate command line parameters.
Server configuration
The configuration of application servers to work with JRebel is done using JRebel > Workspace Settings > Startup - Guide. You can select one of the options from the Startup - Guide view to run your application server.
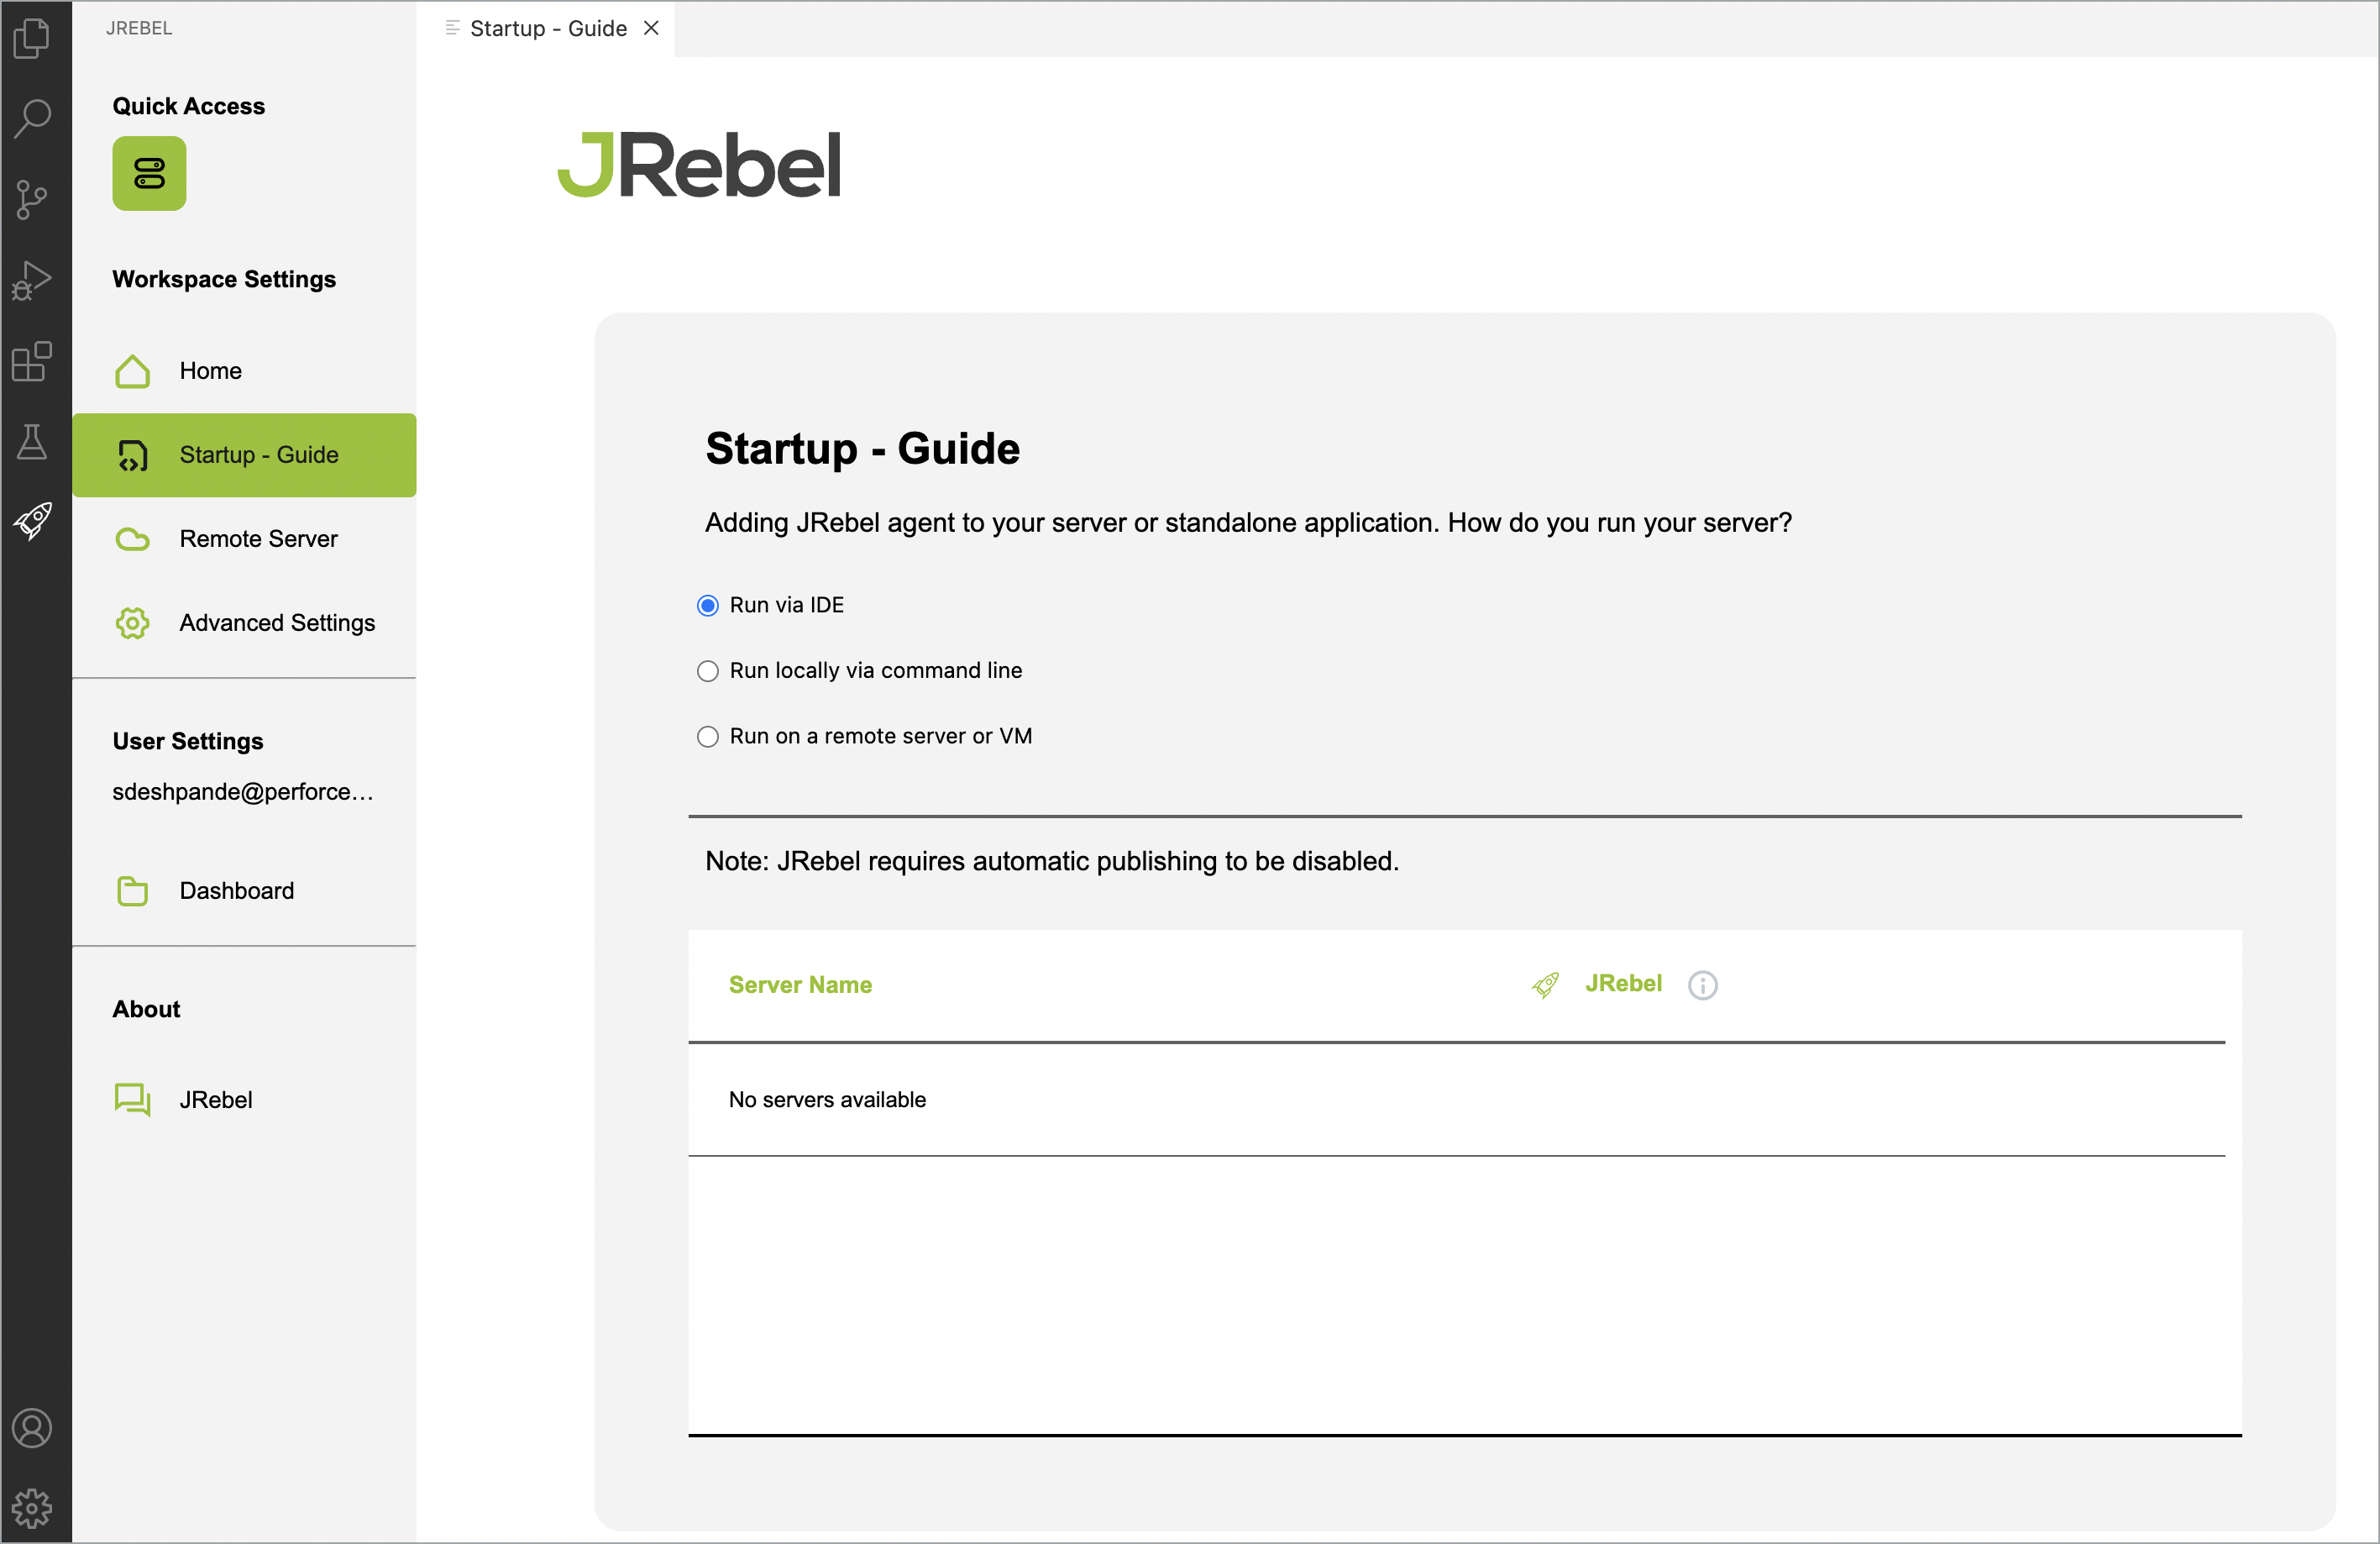
You can run the server or application using the following:
Run via IDE – Displays all application servers configured for the IDE. Select the checkbox next to a server to add the required JVM arguments to the server startup configuration. The automatic publishing will be disabled in the server configuration to prevent unintended automatic redeploys.
Run locally from command line – To run your application servers externally using a command line, select your desired Java version and target environment and follow the instructions to generate a startup script using the command line with JRebel enabled.
Run on a remote server or VM – When using JRebel with remote server support (either locally for a virtual machine, a physical remote server, or cloud), select your desired Java version, application server, and operating system. Follow the instructions to download JRebel on a remote server and generate the startup script.
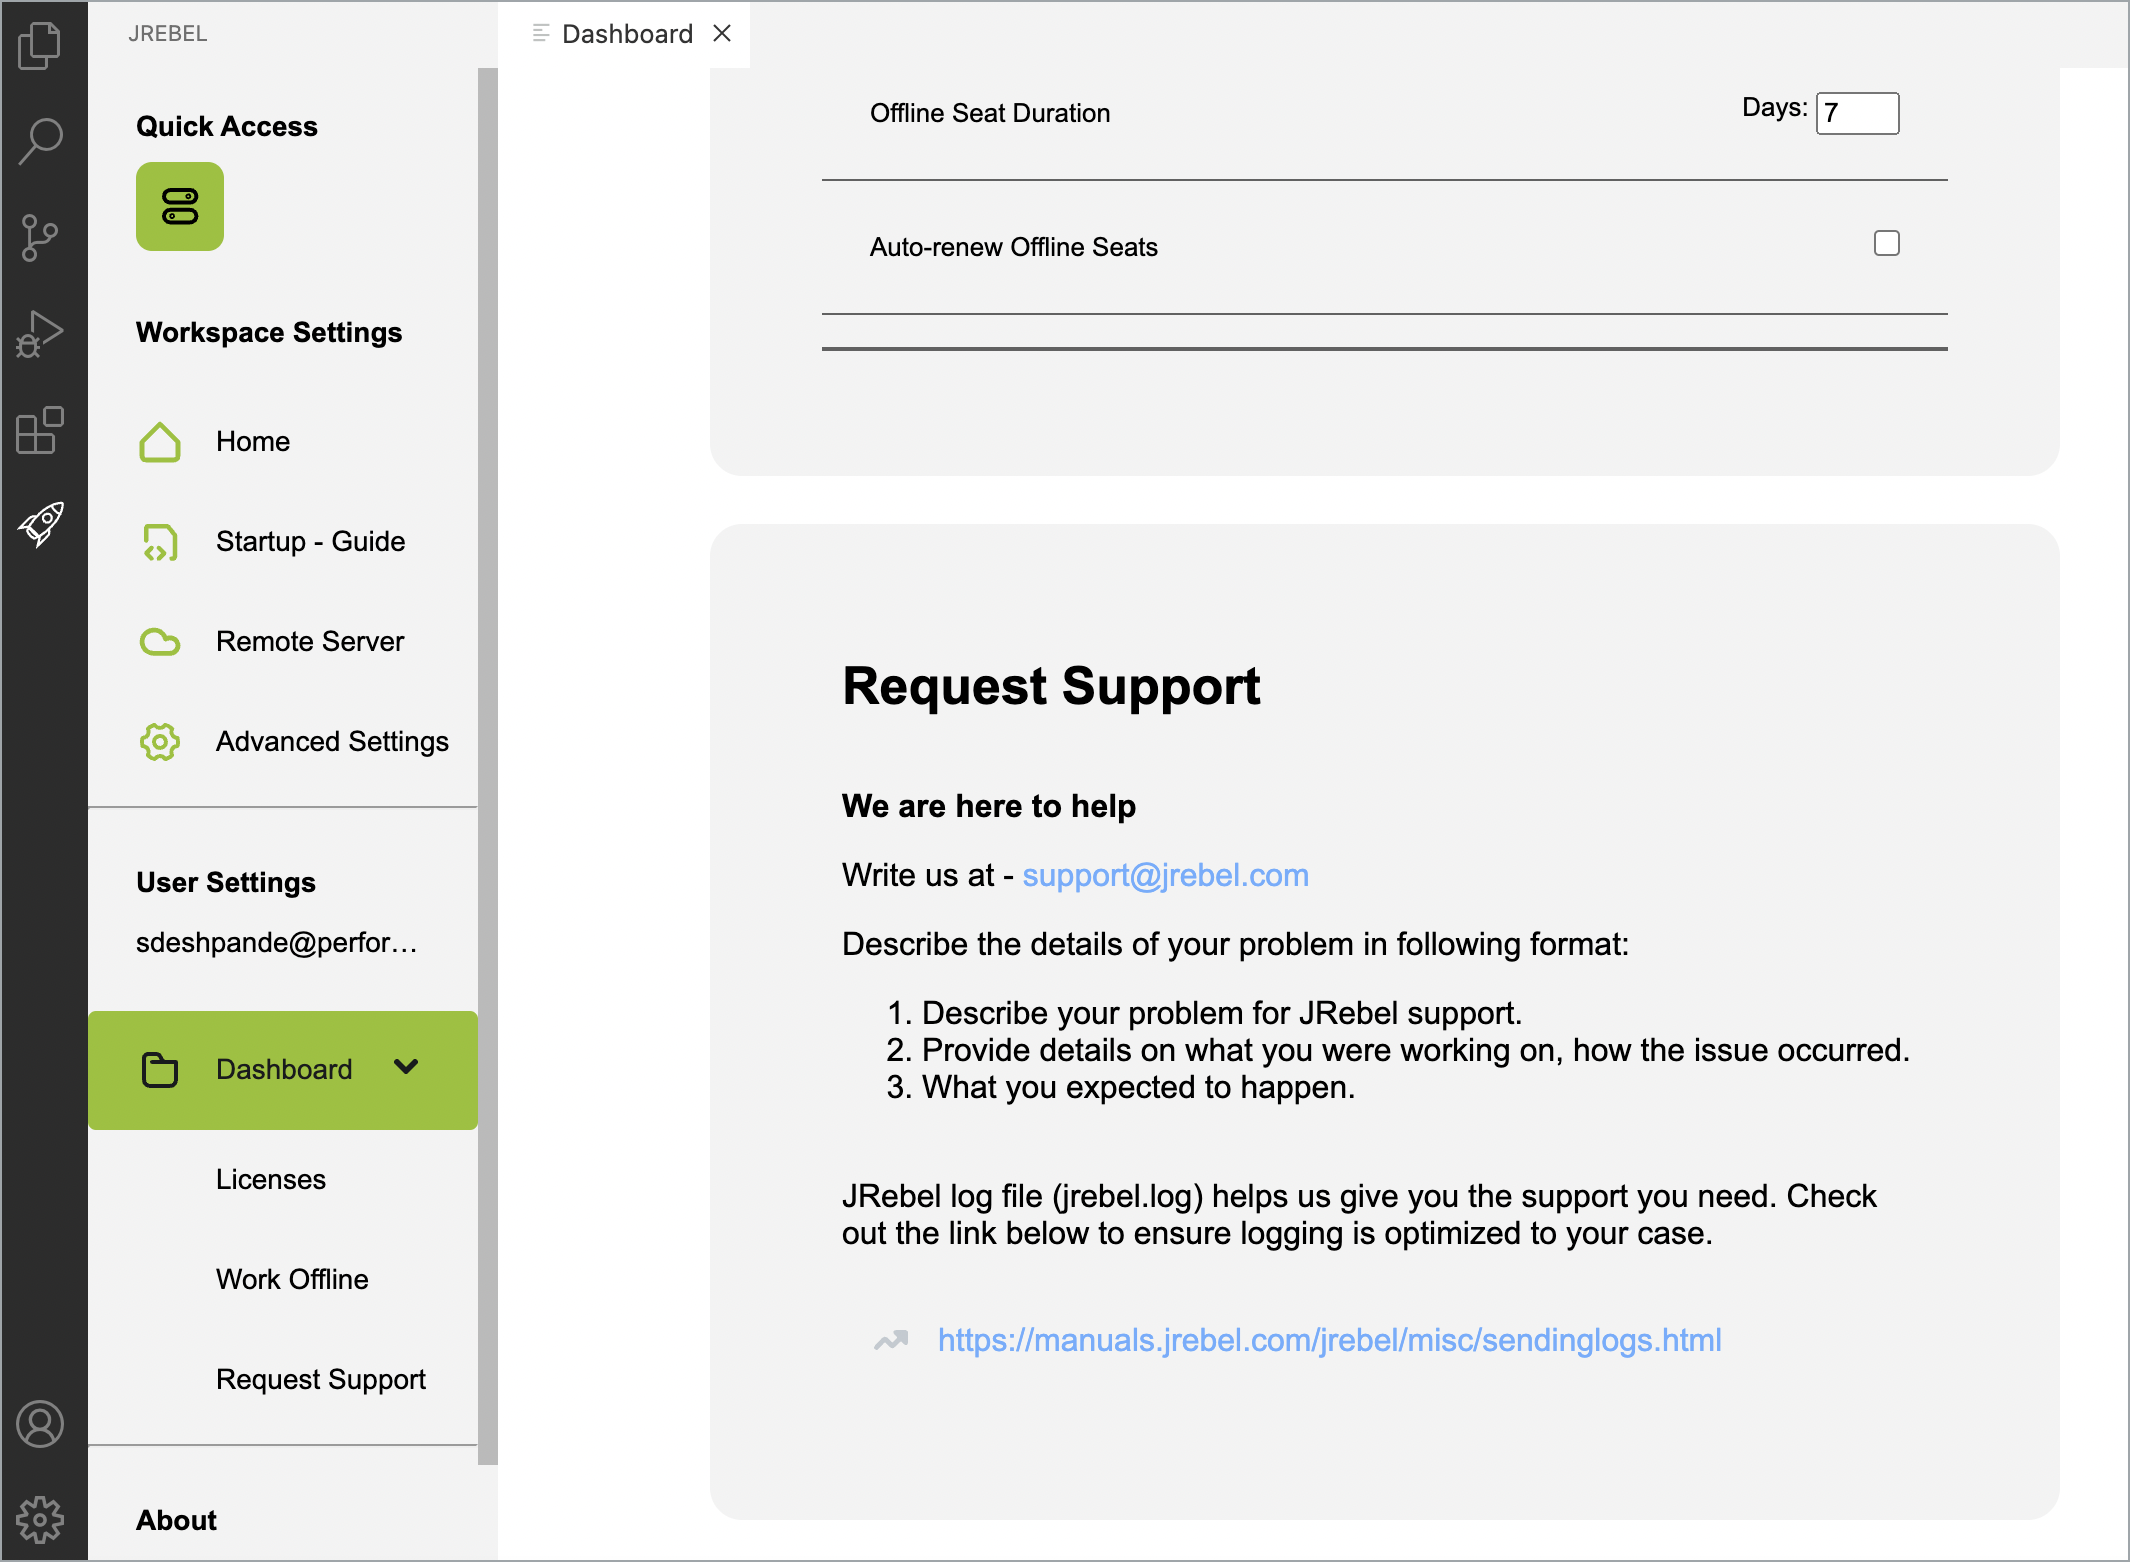
JRebel Support
You can quickly get in touch with the JRebel Support team. Navigate to JRebel > User Settings > Dashboard > Request Support.
Describe the issue for JRebel support and provide more information on what went wrong by sending the JRebel log file (jrebel.log) to the support team at support-rebel@perforce.com.
IDE log level configuration
You can configure the JRebel IDE plugin log level using a command-line parameter. Add the following parameter to {user.home}/.jrebel/jrebel.properties file.
rebel.ide.log=[off|error|warn|info|debug|trace]
The default value for this property is info. The JRebel IDE plugin log file is stored in {user.home}/.jrebel/.
Uninstalling the JRebel plugin
Go to Manage
 (Extensions) or View > Extensions. Open the INSTALLED tab and locate the JRebel plugin.
Right-click the plugin and select Uninstall.
Reload the VS Code for the changes to take effect.