Rational Application Developer
Note
As of JRebel 6.2.7, Rational Application Developer 8.0 or newer is required. When running Rational Application Developer 7.5.x or older, please download JRebel 6.2.6 instead.
As of JRebel 2021.3.1, Rational Application Developer 9.6 or newer is required. When running Rational Application Developer 9.5.x or older, please download JRebel 2021.3.0 instead.
Installation
Update site
You can install the JRebel plugin via the JRebel update site. To do this, follow these steps:
Open Help > Install New Software….
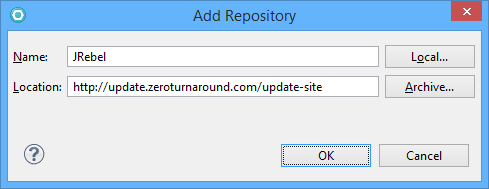
Press Add… to create a new site. Give it a name (for example JRebel) and enter http://update.zeroturnaround.com/update-site as the location. Press OK.
Select JRebel for Eclipse (3.3+) and derivates and press Next.
Note
If you do not have m2eclipse installed on your RAD instance, you will need to deselect JRebel m2eclipse.
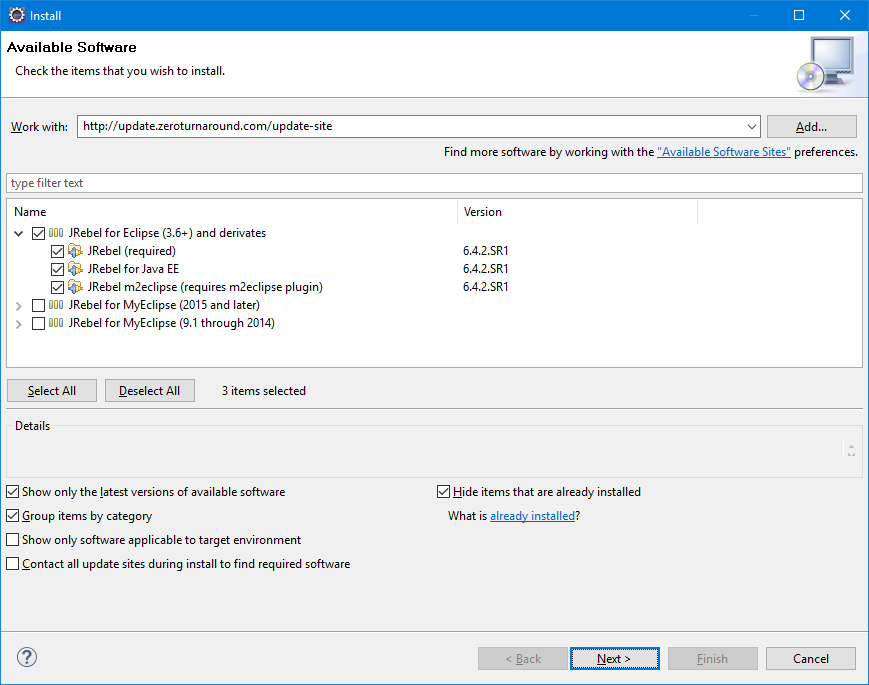
Press Next to continue. Review the features to be installed. Press Next again.
Accept the terms of the license and finish the installation.
Rational Application Developer will want to restart once finished. Restart your IDE.
ZIP archive
The plugin update can also be downloaded as ZIP archive from http://update.zeroturnaround.com/update-site/update-site.zip.
Once downloaded, open Help > Install New Software… and press Add….
Select Archive… to point to the ZIP archive of the update site. Press OK to proceed.
Activation
Following the installation, you probably won’t have a license yet. Once your IDE restarts, the JRebel plugin will notify you about this. This happens via a popup notification:

Click the Activate your Trial link in this popup and the JRebel Activation window will open. You can also open this window from Help > JRebel Activation. Alternatively, click Watch a JRebel video to view a quick introductory video (this opens a browser window).
This window contains two tabs – Try JRebel for FREE and I already have a license.
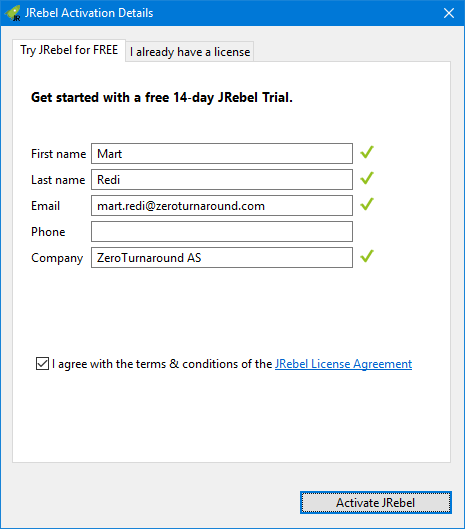
Try JRebel for FREE
To start your 14-day free JRebel Trial, fill out this form, select I agree with the terms & conditions of the JRebel License Agreement and press Activate JRebel. It’s as easy as that!
I already have a license
Open this tab if you already have a JRebel license. You can select one of three activation options:

Activation code – Select this and paste your trial activation code in the text field. Press Activate JRebel to activate using the activation code.
Choose license file from the hard drive (jrebel.lic) – Select this option if you bought a license. We will send you a
jrebel.liclicense file using email. Press Browse and locate yourjrebel.liclicense file on the hard drive. Next, press Activate JRebel to activate using the license file.Connect to License Server – Select this option if your network administrator supplies you with a License Server Group URL. The Group URL is a unique URL, consisting of the License Server address and a unique key. Paste the Group URL into the first field and input your email address into the second. Press Activate JRebel when done to activate using the License Server. JRebel 6 requires License Server 3 or newer for activation.
If everything went according to plan, you should now have a fully functional JRebel installed!
Project configuration
JRebel requires just one configuration file: rebel.xml. This is used by JRebel to map the running application to the workspace. The good news here is that the IDE plugin can automate the configuration for you. In fact, rebel.xml is generated automatically once you enable JRebel nature for the project.
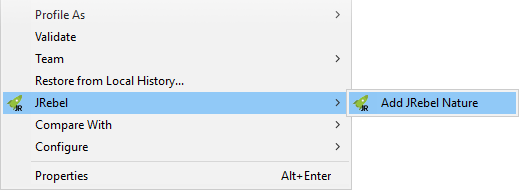
To enable JRebel nature for the project, right-click the project node in the workspace and select JRebel > Add JRebel Nature.
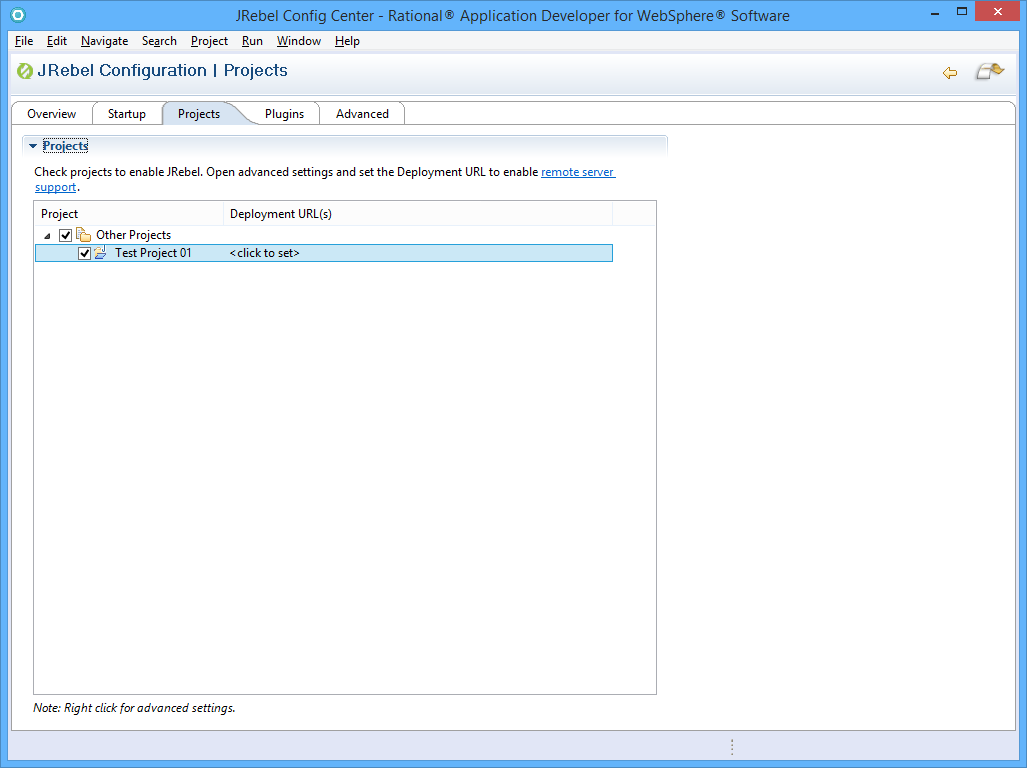
You can also enable JRebel nature via JRebel Configuration, accessible from the Help menu. The Projects tab of the JRebel Configuration lists all your current workspace projects in the Projects section. A checkbox in front of every project title indicates whether JRebel nature is enabled or disabled for that specific project. Selecting the checkboxes for any projects will enable JRebel nature for them. This will also automatically generate the rebel.xml configuration file.
To enable JRebel nature on a particular project, select the checkbox next to the project name.
Note
Once you have generated rebel.xml, you need to redeploy your application to the server for the configuration to take effect.
If you would like to make modifications to the configuration file, please see the full reference for rebel.xml file format.
Note that when using either Maven or Gradle for your project, you might consider using the respective plugin for generating rebel.xml (and not the IDE plugin). For more information, please refer to either Maven plugin or Gradle plugin.
Server configuration
Configuring application servers to work with JRebel is done via Help > JRebel Configuration > Startup. In this view, select the option you use to run your application server.
Run via IDE
A list of all servers configured for your IDE is displayed in JRebel Configuration > Startup > Run via IDE. Select the checkbox next to any server automatically adds the required JVM arguments to the server startup configuration. The automatic publishing option will be disabled in the server configuration – to prevent unintended automatic redeploys.

Run using CLI
When running your application servers externally (for example using a command line), select JRebel Configuration > Startup > Run using CLI. Select your desired Java and application server type. Follow the instructions to generate a startup script or new configuration.
Run on a remote server or VM
When using JRebel with remote server support (either locally for a virtual machine, a physical remote server or cloud), select JRebel Configuration > Startup > Run on a remote server or VM. Select your desired Java, application server and operating system. Follow the instructions to download JRebel onto the remote server and generate the startup script.
JRebel Support
You can quickly get in touch with JRebel Support using the embedded support dialog in Help > JRebel > Submit a Support Ticket.
From here, describe your issue and specify your email address for further contact. Enable JRebel Agent trace level logging to give JRebel Support more information on what went wrong and choose to add the log files to the support ticket. Press Send when ready.

Note
If you are unable to submit the support ticket in RAD, please send the log files with a description of the problem to support-rebel@perforce.com.
Updating the JRebel for myEclipse plugin
Open Help > Check for Updates.
Select the following JRebel plugin components from the update list: JRebel, JRebel for Java EE, JRebel m2eclipse.
Press Next to continue.
Review the terms and agreements and complete the installation.
Restart Eclipse.
Note
To verify you current JRebel version, open Help > JRebel > Configuration and select the Advanced tab. Refer to the JRebel agent section to find your current plugin version. When upgrading from very old plugin versions, a complete plugin uninstall and new version install is recommended instead.
IDE log level configuration
You can configure the JRebel IDE plugin log level using a command line parameter. You can add this parameter to your {user.home}/.jrebel/jrebel.properties file.
rebel.ide.log=[off|error|warn|info|debug|trace]
The default value for this property is info. The JRebel IDE plugin log file itself is stored in {user.home}/.jrebel/.